Freezing Soap Bubbles
Soap bubbles are filigree and fascinating creations, with which you can easily occupy small children as well as photographers for hours – especially in winter.
Photography in Winter
What fascinates me most about photography is the possibility of capturing things that otherwise elude the naked eye – because they are too small, pass by too quickly, or happen too slowly. For me, snowflakes are one of these things. So small, so fleeting, and each unique. In fact, to this day I have not managed to capture a beautiful photo of a single snowflake.
Of course, this is largely due to the fact that it practically never snows here in the Rhine-Main area. In the last few winters it was a matter of luck to even have a single day where it was below freezing in the morning. At least I managed to capture a couple of nice white frost images.
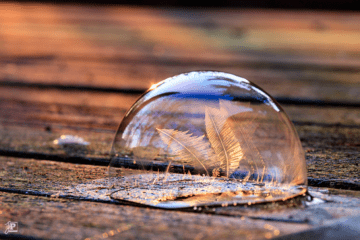
If you search the Internet for winterly photo ideas, one suggestion comes up again and again: freezing soap bubbles! The skin of a soap bubble consists of three layers: Soap, water, and soap again. If it’s cold enough, the water layer in the middle freezes into ice before the soap bubble bursts. In the process, the ice crystals form fascinating shapes that sometimes look like stars and sometimes like feathers. The whole process takes less than ten seconds, so it’s a very ephemeral kind of art that nature creates here. Perfect to capture on camera!
Freeze soap bubbles – but how?
There are numerous tutorials on the internet for this, including one by Benjamin Jaworsky (YouTube link). It seems as if making the “right” bubble liquid is a science by itself. I just used the solution exactly as I bought it at the toy store.
Of course, it has to be cold enough. My photos were taken between 15°F and 25°F – the colder, the better. At least as important as the right temperature is that there is as little wind as possible, ideally no wind at all, because the bubbles are extremely sensitive.
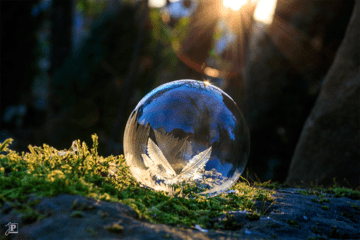
If the external conditions fit, you look for a suitable place to present the soap bubble in a beautiful surrounding. I used both the patio table and some moss-covered stones for this purpose. Using a straw, carefully blow the soap bubble directly onto the target spot. It takes some practice to get nice spheres, and not just hemispheres as seen in the first attempt above.
Once that is accomplished, it takes five to ten seconds for the magic to go off. Conveniently, that’s exactly the time it takes to put the bubble dispenser aside and pick up the camera. Where the thin bubble touches the cold ground, the first ice crystals form. From there, they slowly grow over the entire sphere like ferns or feathers. If it is cold enough, star-shaped ice figures will also form on top of the sphere and float around.
I highly recommended using the continuous shooting function of the camera. Otherwise, you’ll easily miss the most beautiful moment because the figures are constantly changing. The autofocus works great with the ice crystals, and the aperture should not be too wide open to have sufficient depth of field.
The last factor is the light. I recommended taking the pictures in the early morning – not only because it is the coldest time of the day, but also because the low sun provides a nice backlight with great colors. This is how the ice crystals turn into colorful rainbows.
So it takes a lot of “ingredients” that have to fit to get such pictures. Beautiful photos are not easy to get to – but provide a greater sense of achievement when it all works out.
The Result
Who would have thought, it did snow after all. It was less than an inch, but enough to give the patio table a closed snow cover – the perfect background for this colorful and ephemeral work of art!
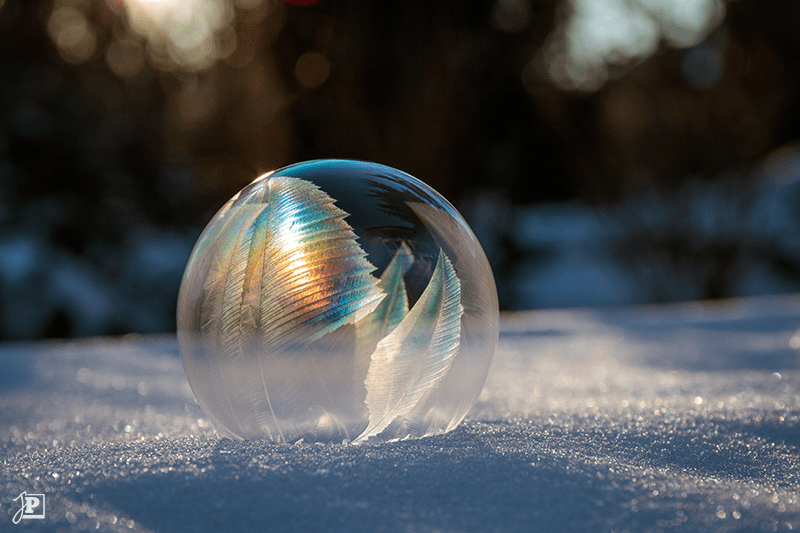
This soap bubble with its colorful ice crystals adorned the February page in my 2019 calendar and was also already part of an exhibition. Friends of mine have this picture, together with the frozen soap bubble on the moss, as a large-format prints in their home.


